
How to Install and Run HARDHAT in windows?
In this article you will get the clear understanding of the installation and usage of hardhat in our respective desktop's .


What is Hardhat ?
Hardhat is a development environment for Ethereum software. It consists of different components for editing, compiling, debugging and deploying your smart contracts and DApps, all of which work together to create a complete development environment.
- In order to use hardhat we need to first install the nodeJS in our desktop where the npm package manager helps us in the installation and work on it .
Installation of Hardhat :
- First, we need to install the npm package manager in our respective PC by using the command .
npm init
While installing npm we need to mention some details which are optional .They are :
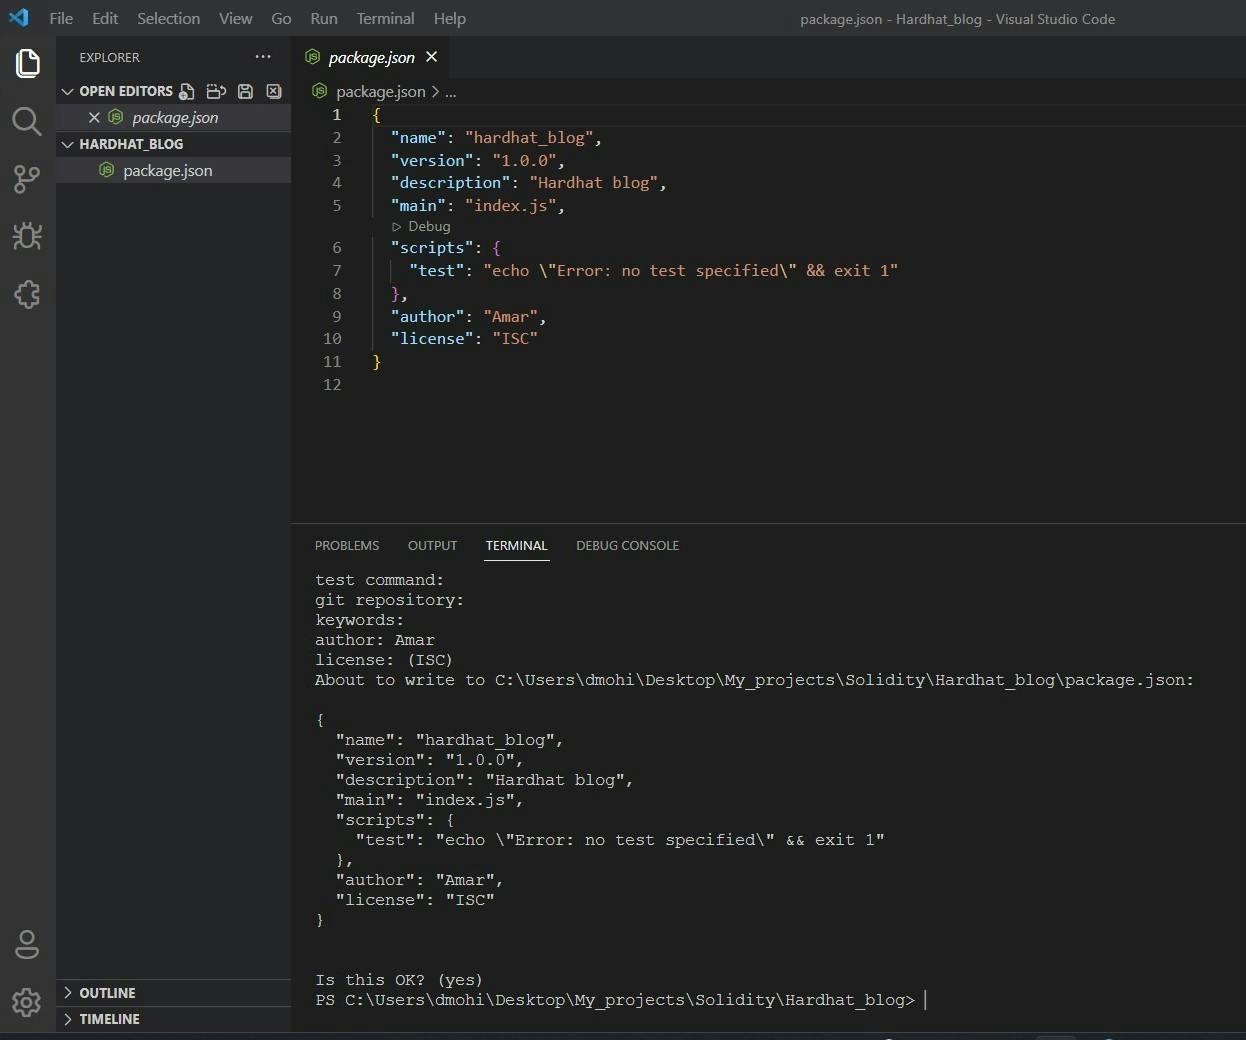
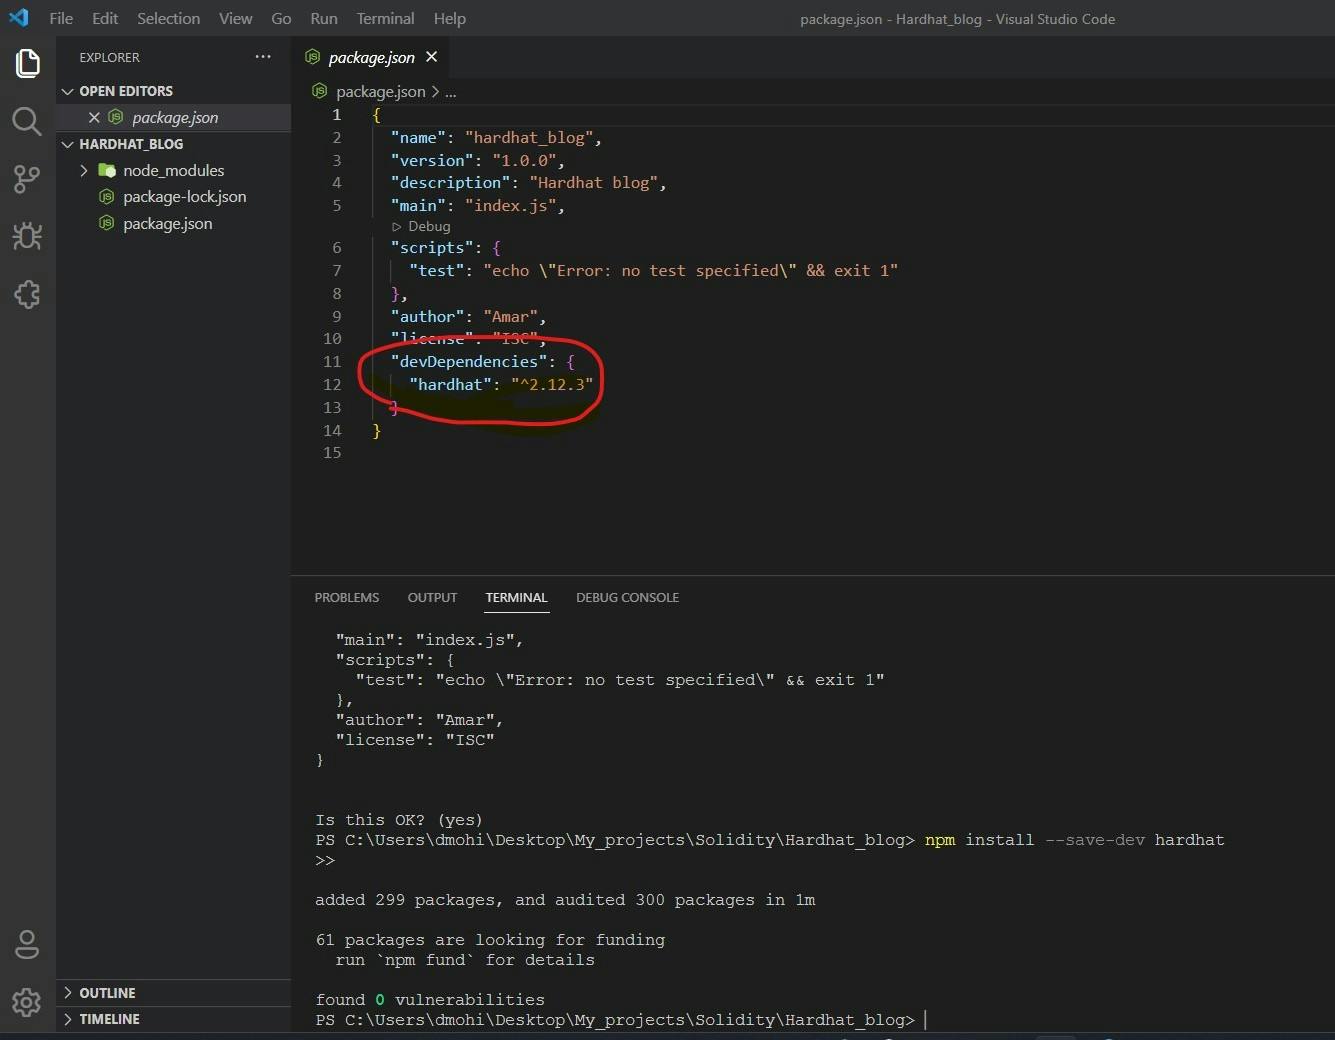
- Second , We need to verify the package.json file and install the hardhat using the command
npm install --save-dev hardhat
Now we can see that the hardhat had been installed in our project .
- Then the installation part is done and we are good to use hardhat in our respective PC by mentioning some basic details regarding the project .
- Run the hardhat to see that it is installed properly or not and to start the project by using the command
npx hardhat
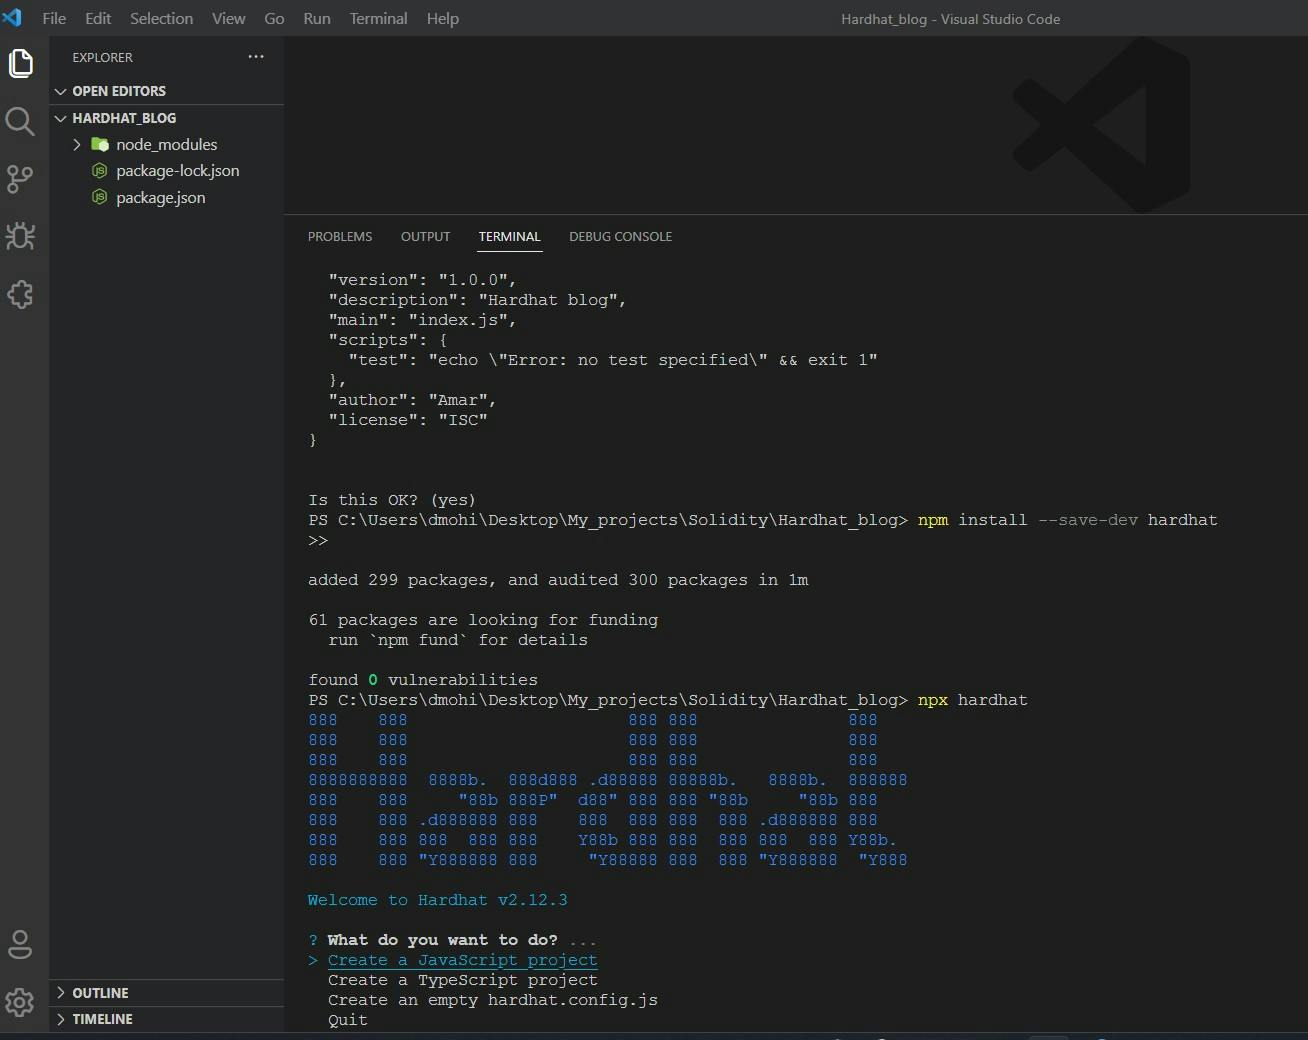
Once you press the "create a java script project " a complete demo project would be installed in our folder . Like this
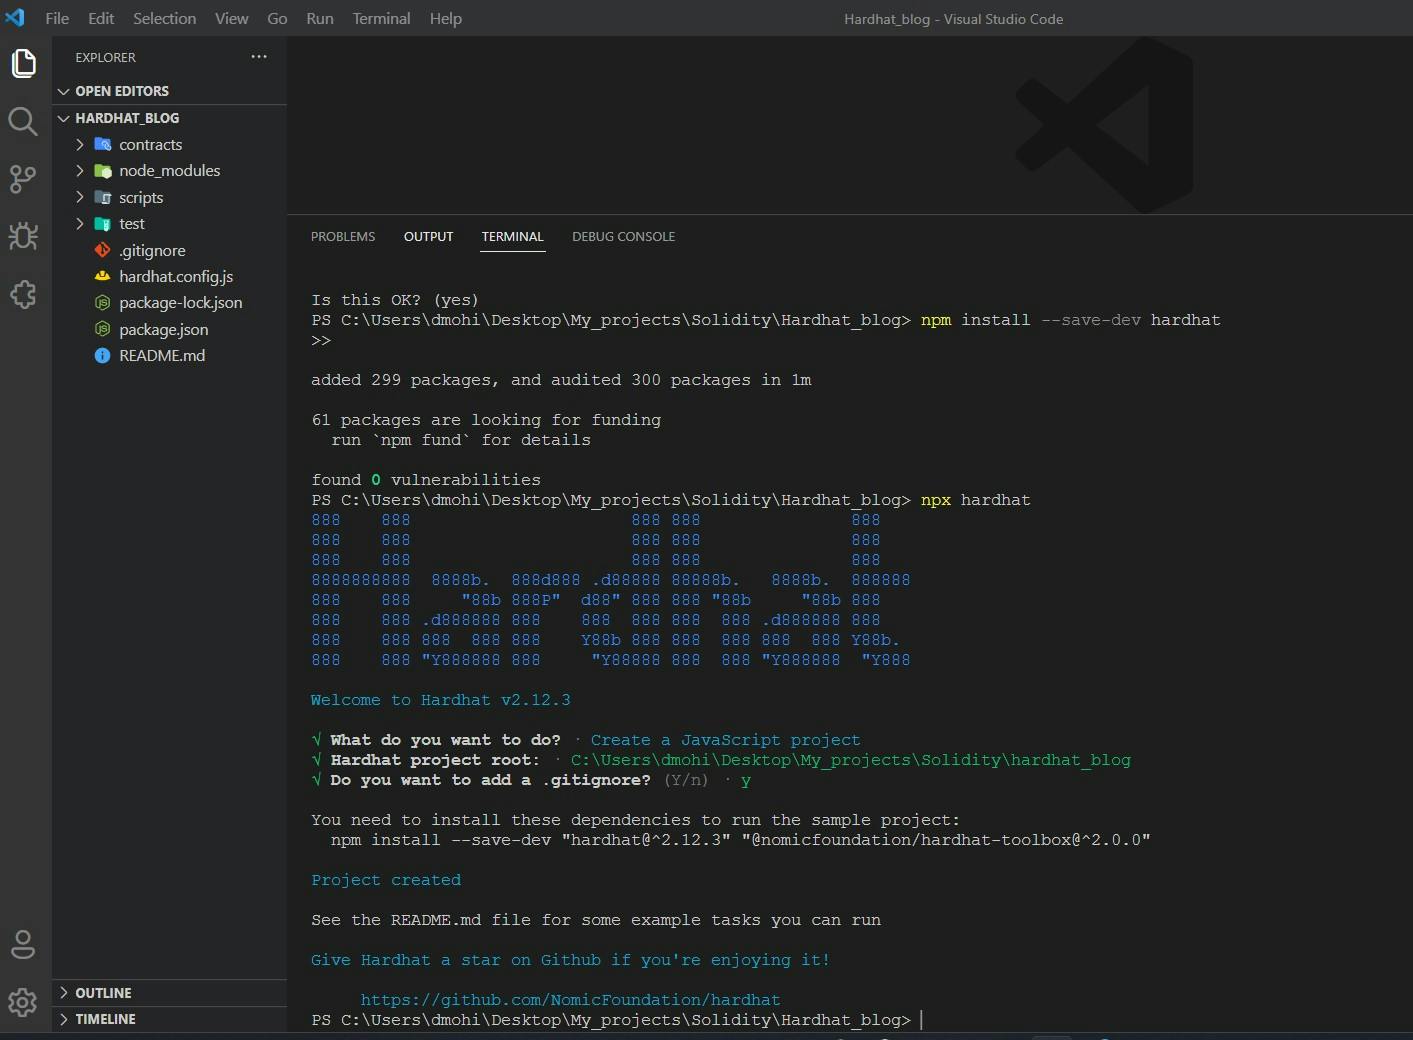
In this way we use hardhat to install and run in our desktop .
We write the code in the contracts folder which we want to deploy .
Testing the smart contract :
We write the test code in the "test" folder by creating a file using chai and mocha frameworks . Here we do the complete validation of the code by testing the each functionality of the smart contract .
After writing the test code we need to run the test code by using the below command in the terminal .
npx hardhat test
Compiling the code :
In order to compile the code we need to use the command :
npx hardhat compile
After compilation we get the ABI of the project in the folder called artifacts which would be created automatically .
Deploy the smart contract :
For deploying the contract in a particular network we need to run the deploy.js file in the scripts folder by using the command
npx hardhat run scripts/deploy.js
Now the particular contract has been deployed to the respective network .
Verify the smart contract :
In order to make sure that the code is visible in the ether scan we need to verify the contract . So for the verification process we first need to install a package ether scan in our project which can be done by using :
npm i -D @nomiclabs/hardhat-etherscan
With this command we will install the packages required for the verification of the contract and then we need to import the etherscan in our project by using a code below in the hardhat config.js
require("@nomiclabs/hardhat-etherscan");
After doing this successfully we need to run the command based on our network name and contract address
npx hardhat verify --network <network name> <contract address>
Then the verification process would be completed and the contract would be visible in ether scan and we can make the possible changes from their if we are the owner of the contract which might be based on the code written .
Conclusion :
Their are so many frameworks which help us to achieve this above requirements but the hardhat makes it even more simpler and easier to work . In this way we configure the working environment for our code to run, compile, test and deploy the smart contract .
If you have any questions or suggestions, feel free to reach out to me! 😊
🕊️Twitter : twitter.com/DMohindar
📩 Email : d.mohindar1999@gmail.com
🔗LinkedIn : linkedin.com/in/mohindar-amarnadh-b77a28150